Installing GOAD on VMware ESXi with Kali Linux
Overview
This post reflects on the step-by-step setup of deploying GOAD (Green AD) Active Directory lab environment on my VMware ESXi server. This includes basic VM provisioning, configuring network interfaces, installing dependencies like Vagrant and Ansible, preparing the system, and all the tricky bug-fixes along the way. I’m not a professional at this whatsoever but hopefully this saves you some Googlin’.
🖥️ Kali VM Configuration on ESXi
I decided to deploy a brand new Kali image for the purpose of lab creation and maintenance. This doesn’t need to be Kali. A lightweight Ubuntu image would probably work well.
- Disk: 200GB (I’m not even consuming half of this space.)
- Memory: 24GB (100% overkill, barely touched 10% of this during install)
- vCPUs: 4 (CPU was maxed during install, I would increase this if possible)
- NICs: 2
- NIC 1: External network (VM Network)
- NIC 2: Private network (Private)
Configure Network Interfaces
In ESXi, make note of what your port groups are called and create a new one specifically for GOAD if needed. I used a new vSwitch with no uplinks (ie: Private) then attached the port group to use that. Note your MAC addresses on the Kali VM once you’ve got both network adapters configured and connected.
Set the external NIC to use DHCP and configure the private NIC manually:
IP Address: 192.168.56.X
Subnet Mask: 255.255.255.0 (/24)
Gateway: 192.168.56.1
Choose an IP where X is above 30 to prevent conflict with lab defined IPs. Review GOAD documentation to confirm default IPs.
Reboot Kali to apply NIC settings.
Then verify IP assignments:
ifconfig
eth0 and eth1 should now have IPs.
🔐 (Optional) Enable SSH Access
For convenience, enable SSH for remote access to Kali instead of using the VMware Remote Console:
sudo systemctl enable ssh
sudo systemctl start ssh
📦 Install Required Packages
sudo apt install vagrant
sudo apt install ansible
Install Python Package
Kali protects it’s virtual environments so pip will throw errors. Workaround:
pip3 install pywinrm --break-system-packages
🔌 Install Vagrant Plugins
vagrant plugin install vagrant-vmware-esxi
vagrant plugin install vagrant-reload
vagrant plugin install vagrant-vmware-desktop
vagrant plugin install winrm
vagrant plugin install winrm-fs
vagrant plugin install winrm-elevated
vagrant plugin install vagrant-env
📁 Install OVF Tool
- Download the OVF Tool for Linux (version 5.0.0 ZIP).
- Unzip it and add to your temporary PATH:
export PATH="$PATH:/home/kali/Downloads/ovftool"
To make this permanent, add the line above to your
.bashrc.
🛠️ Setup vagrant-vmware-utility
- Download
vagrant-vmware-utility_1.0.24-1_amd64.debfrom the below link. - Manually create the required folders:
sudo mkdir -p /opt/vagrant-vmware-desktop/bin - Extract and move the
vagrant-vmware-utilityfile into/opt/vagrant-vmware-desktop/bin/:mv ~/Downloads/vagrant-vmware-utility_1.0.24-1_amd64/opt/vagrant-vmware-desktop/bin/vagrant-vmware-utility /opt/vagrant-vmware-desktop/bin/ - Follow the remaining official install instructions to generate the certs and install the service.
sudo /opt/vagrant-vmware-desktop/bin/vagrant-vmware-utility certificate generate
sudo /opt/vagrant-vmware-desktop/bin/vagrant-vmware-utility service install
Fix Ruby Dependency Issue
Fix a problem with the dotenv gem used by the vagrant-env plugin. This command is from the known HashiCorp issue:
sudo sed -i -e 's/exists?/exist?/g' /root/.vagrant.d/gems/3.3.8/gems/dotenv-0.11.1/lib/dotenv.rb
Confirm your gem number in the above path. Initial instructions listed 3.3.6 but mine was 3.3.8.
🔧 Prepare the ESXi Host
- Enable SSH on the ESXi host
Navigation: Host > Manage > Services
🧪 Deploy GOAD
Clone the Repository
git clone https://github.com/Orange-Cyberdefense/GOAD
cd GOAD
Launch Installer
This initializes vagrant, the first time it is run. Once you lanch GOAD, you’ll see the prompt as: GOAD/vmware_exsi/local/192.168.56.X >
./goad.sh -p vmware_esxi
Check Prerequisites
GOAD/vmware_esxi/local/192.168.56.X > check
You may need to address any errors or install missing plugins based on the check output.
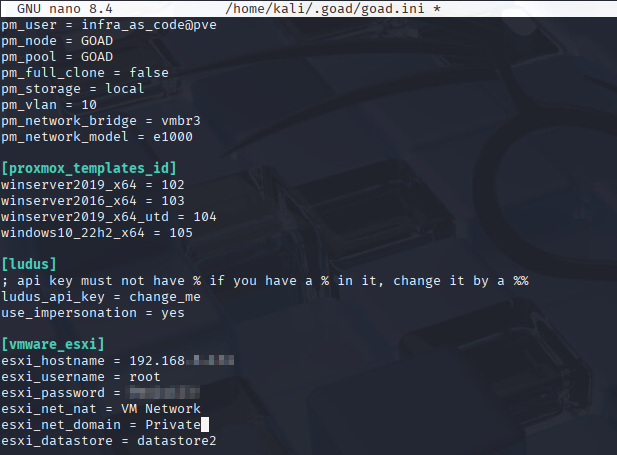
Edit the GOAD Configuration
This is where you will modify the configuration for your specific ESXi installation. Exit GOAD to modify this.
nano ~/.goad/goad.ini
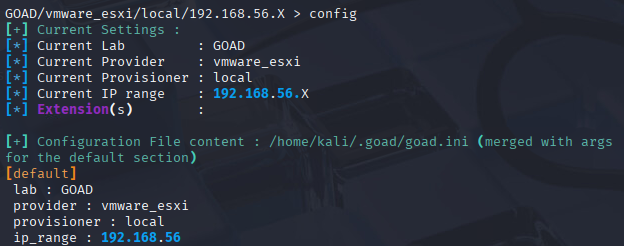
Save the script and restart GOAD to apply your custom config changes. Verify the changes:
GOAD/vmware_esxi/local/192.168.56.X > config
Launch GOAD
This will kickoff all steps required to create and configure the lab. This will take several minutes to complete.
GOAD/vmware_esxi/local/192.168.56.X > install
Errors may occur that require manual intervention. I will update as I find any common bugs with my process.
Reinstall Lab
If you’re anything like me, you will have screwed up your environment eventually. I mean, that’s kind of encouraged right?
Maybe you just ran out of rearms and forgot everything you knew about setting this up. (Also like me)
First, I ran status and found I was unable to connect to ESXi. This was just because I kept the ssh service disabled like a good boy.
Next, I ran delete which will destroy the environment. For our primary purpose we just want the old VMs gone but this will also destroy the lab instance so if you have multiple instances, you’ll want to ensure you have the right one selected. This actually runs pretty quickly.
Doing install should have just worked. HA, ya right.

You’ve got to put the ovf tools in your path because you didn’t do it permanently and didn’t care to look up how. Did you do it this time? Nope.
export PATH="$PATH:/home/kali/Downloads/ovftool"
Connected back to GOAD with ./goad.sh -p vmware_esxi and ran install again. We’re on our way.
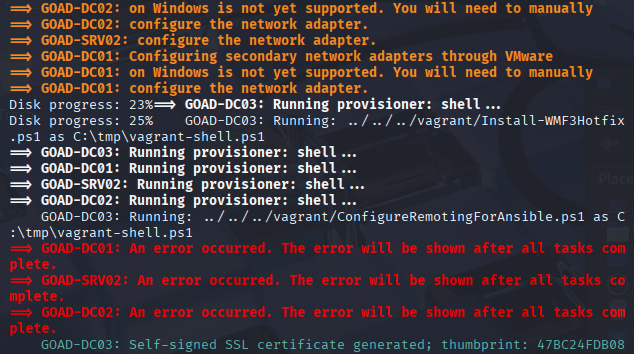
Post install, there are a few errors about configuring secondary network adapters but I found that some looked fine. Here are the changes I had to make:
- Install vmtools on DC02
- Fix Ethernet Adapter #1 on DC02. It was set to automatic instead of manually specifying 192.168.56.11
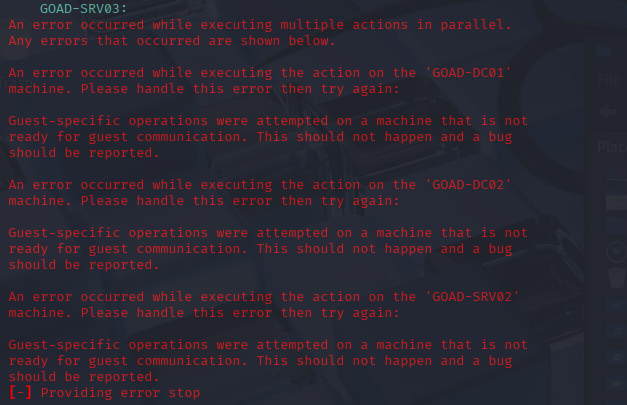
The VMs were now built but they were all in workgroups so the ansible playbooks did not provision the domains at all. I found this error to be cause:

I found a solution in the ansible persistent “unreachable error” section of: https://orange-cyberdefense.github.io/GOAD/troobleshoot/
It took me a while to figure out where I needed to edit the file. I tried a Vagrantfile and that wasn’t right. I finally found which inventory file is being used by looking at which commands were being run by the ansible playbook:
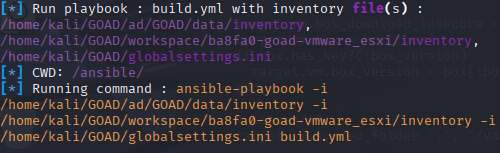
I found the section that was referenced in the GOAD troubleshooting document in the /home/kali/GOAD/ad/GOAD/data/inventory file.
Uncomment out this section:
# ansible_winrm_transport=basic
# ansible_port=5985
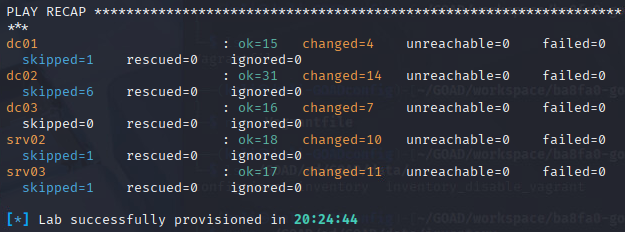
Relauched install and came back the next day to find success!